






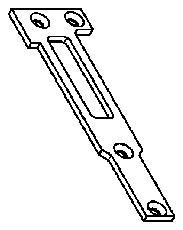
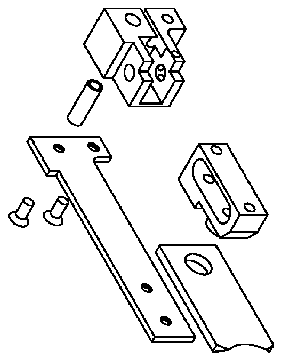

- 1 specific motion steps
- 2about
- 6paragraph
- 600blade
- 700mounts stopper
Abstract
An improved apparatus for use with nails or claws comprising an adjustable pressure activated clipper, which effectively closes upon successful capture and engagement of a nail or claw due to pressure realized on the surface of the clipper's articulating trigger by the nail or claw. In operation, as pressure is applied to the internal surface portion of the trigger by the user, the trigger automatically articulates and releases the refracted blade to cut the nail or claw at the desired length.
Description
BACKGROUND OF INVENTION
[0001] 1. Field of the Invention
[0002] The present invention is in the technical field of clippers. More particularly, the present invention is in the technical field of clippers that are used for cutting nails or claws of animals.
[0003] 2. Description of Related Art
[0004] In order to clip the nails or claws of an animal with typical clipping instruments, a user typically holds a clipping tool in one hand and maintains control and proper positioning of the animal with the other hand. The user is then required to keep the clipper tool prepared until successful capture and engagement of the animal's nail or claw by the clipping tool. Once successful capture and engagement of the animal's nail or claw occurs, the user can then utilize the clipping tool by applying pressure on the clipper's cutting mechanism, enabling it to cut the nail or claw. In such a setting, the user may be limited as to what nails or claws may be successfully captured and engaged because of the need to retain the use of a single hand in order to maintain readiness of the clipper for successful capture, engagement and cutting of the nail or claw. In such a setting, the user may also be limited as to what consistent length the nail or claw would be cut because of a typical clipper's design, which requires that the user maintain close proximity and contact with the clipper to manipulate the cutting mechanism for successful capture and engagement of the nail or claw. The cumbersome, slow and inconsistent operation of typical clipping instruments presents a risk of substantial injury to the quick of an animal's nail or claw during the cutting process. Thus, there remains a considerable need for devices that facilitate the successful capture, engagement and consistent cutting of a nail or claw to a desired adjustable length.
SUMMARY OF INVENTION
[0005] The present invention is directed at a clipper for use with animal nails or claws and features a mechanical design that enables the clipper to be easily preset in a ready position through an articulating motion and rapidly utilized through a pressure motion. The clipper is designed to remain in a preset position until the receptacle makes appropriate contact with its intended target. The present invention provides a pressure activated clipper mechanism that easily and rapidly activates upon successful capture and engagement of a targeted nail or claw due to appropriate directional pressure realized on, or other contact made with the receptacle portion of the invention by a nail or claw. The present invention substantially decreases the time required and effort to successfully capture, engage and cut a nail or claw to a desired adjustable length.
[0006] The present invention utilizes a cutting mechanism with an articulating lever that can be easily manipulated in such a way as to prepare the trigger to activate the cutting mechanism. Once the trigger is prepared, it remains ready until the invention makes appropriate contact with the intended nail or claw target so as to activate the cutting mechanism. The present invention enables this appropriate contact to be made on the inside of the receptacle portion through a pushing or hitting motion. In either form of intended contact, contact made with a nail or claw activates the invention's preset trigger, which quickly activates the cutting mechanism and easily cuts the engaged nail or claw inside the receptacle, substantially reducing the risk of injury to the quick of the animal's nail or claw. The invention also facilitates the repetitive and laborious steps required to cut all of an animal's nails or claws to a consistent length. Embodiments of the present invention include utilizing a user-adjustable positioning mechanism within the receptacle, which enables a user to easily preset a desired nail or claw cutting length. The present invention is also useful for livestock, where the unpredictable movement of livestock animals often presents substantial difficulties for engaging nails or claws into a cutting receptacle. Larger-sized embodiments of the present invention can be utilized and mounted on poles or beams, enabling vertical up-grabs, horizontal grabs, angular grabs or other positioning to secure a nail or claw.
[0007] The mass of the unit surrounding the cutting receptacle of the invention provides stability that permits one-handed securing of the invention's receptacle to a nail or claw. In other embodiments of the invention, some or all of the individual parts that comprise the assembly may be combined, reducing the number of parts, and made of materials including but not limited to aluminum, stainless steel or combinations thereof. In other embodiments of the invention, some or all of the individual parts that comprise the assembly may be made of plastic materials to save weight or reduce cost.
[0008] The pressure activated clipper may have a variety of configurations, shapes, or sizes depending on the size and type of a nail or claw and necessary loading requirements. For instance, a larger or longer nail or claw would use a wider or deeper receptacle to enable successful engagement. A nail or claw necessitating a higher loading level would use a larger, heavier pressure activated clipper to enable successful capture, engagement, and secure retention of the nail or claw for clipping. A thicker nail or claw would also utilize a blade capable of higher loads to enable successful and consistent results when cutting.
[0009] The present invention introduces such refinements. In its preferred embodiments, the present invention has several aspects or facets that can be used independently, although they are preferably employed together to optimize their benefits. All of the foregoing operational principles and advantages of the present invention will be more fully appreciated upon consideration of the following detailed description, with reference to the appended drawings.
DESCRIPTION OF DRAWINGS
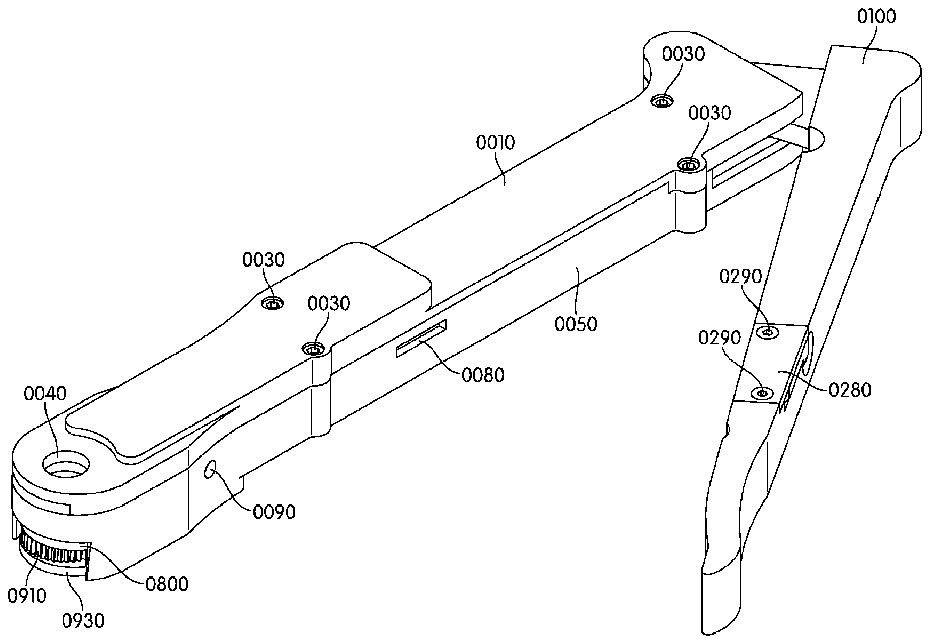
[0010] FIG. 1 is a perspective drawing of a pressure activated clipper in an open position in accordance with a preferred embodiment of the present invention.
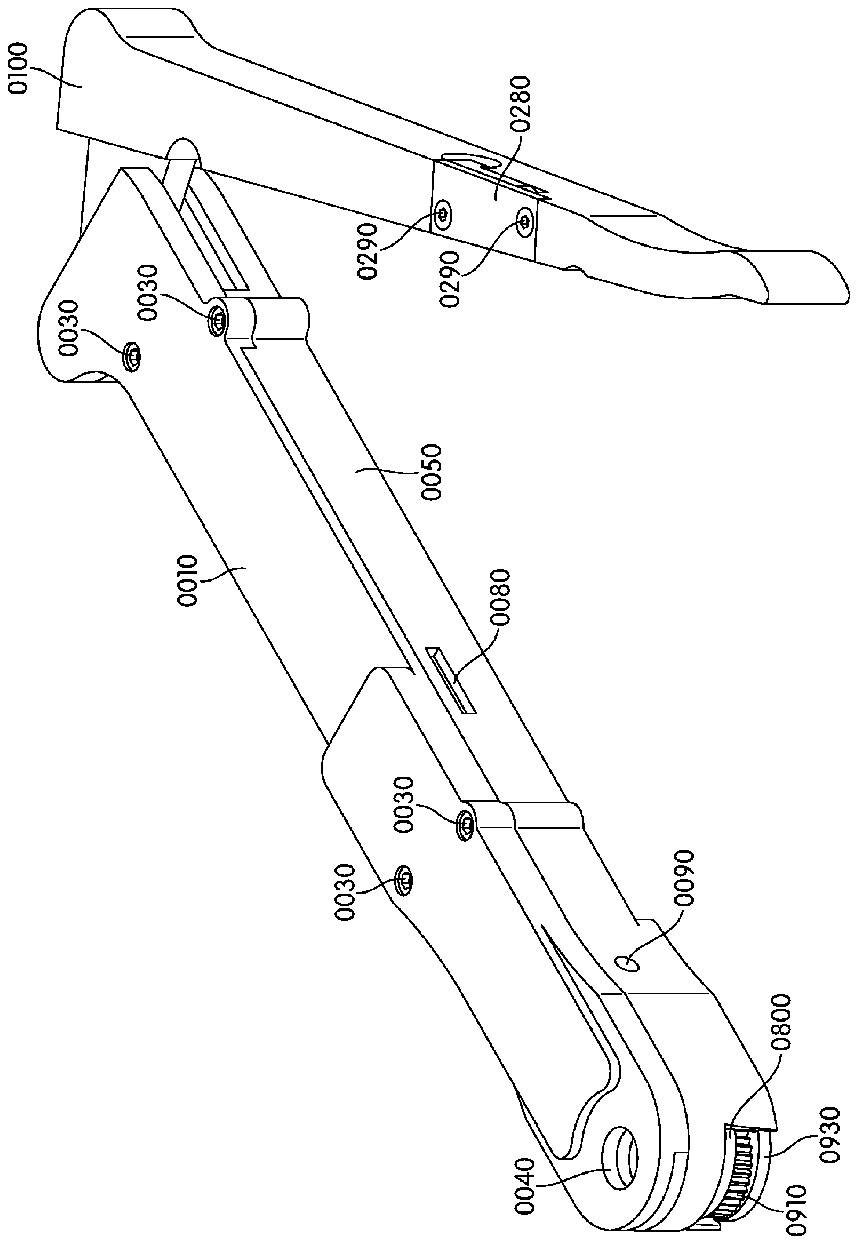
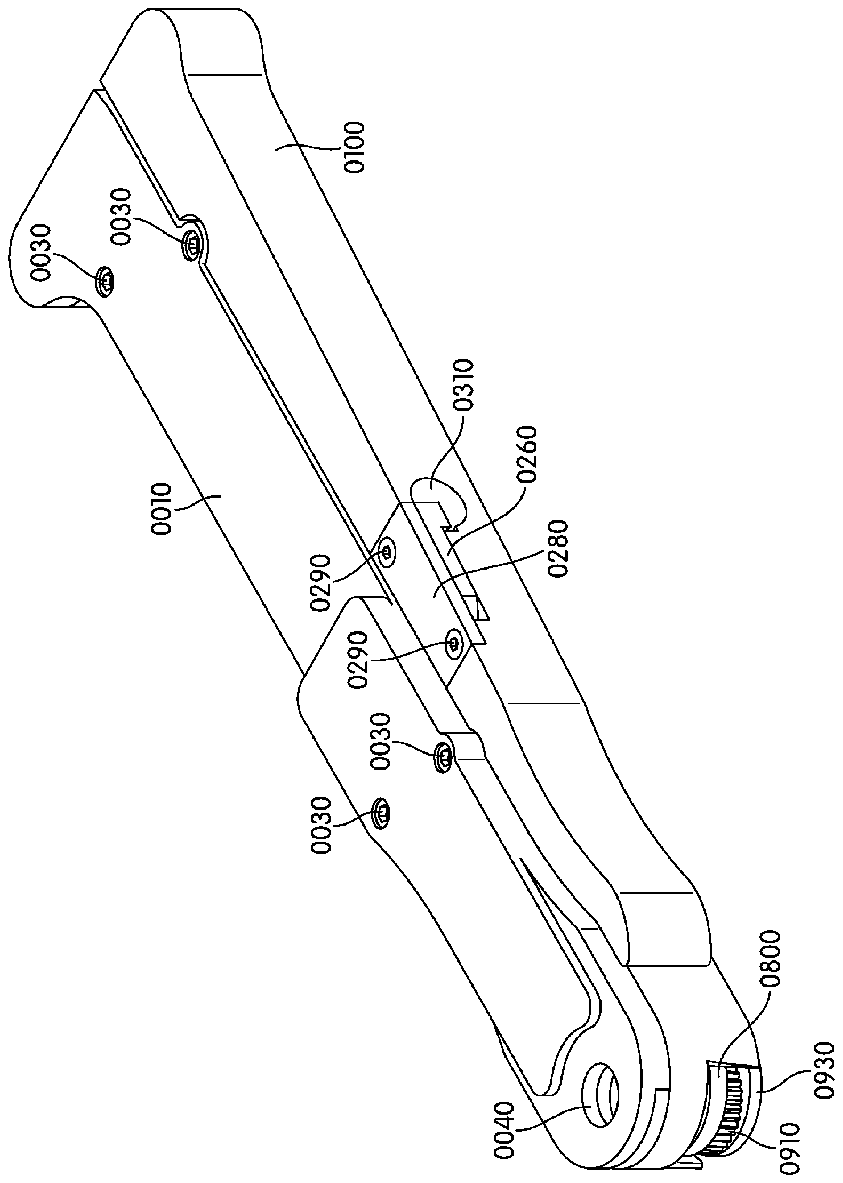
[0011] FIG. 2 is a perspective drawing of a pressure activated clipper in a closed position in accordance with a preferred embodiment of the present invention.
[0012] FIG. 2A is an exploded view drawing of the clipper body assembly in accordance with a preferred embodiment of the present invention.
[0013] FIG. 3 is a top view drawing of a pressure activated clipper in a closed position in accordance with a preferred embodiment of the present invention.
[0014] FIG. 4 is a bottom view drawing of a pressure activated clipper in a closed position in accordance with an embodiment of the present invention.
[0015] FIG. 5 is a side view drawing of a pressure activated clipper in a closed position in accordance with a preferred embodiment of the present invention.
[0016] FIG. 6 is a second side view drawing of a pressure activated clipper in a closed position in accordance with a preferred embodiment of the present invention.
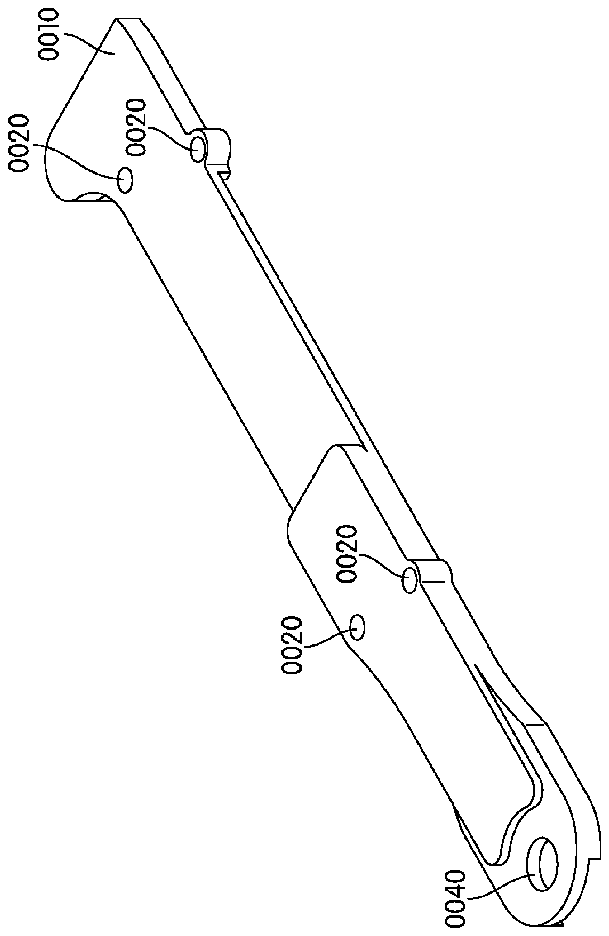
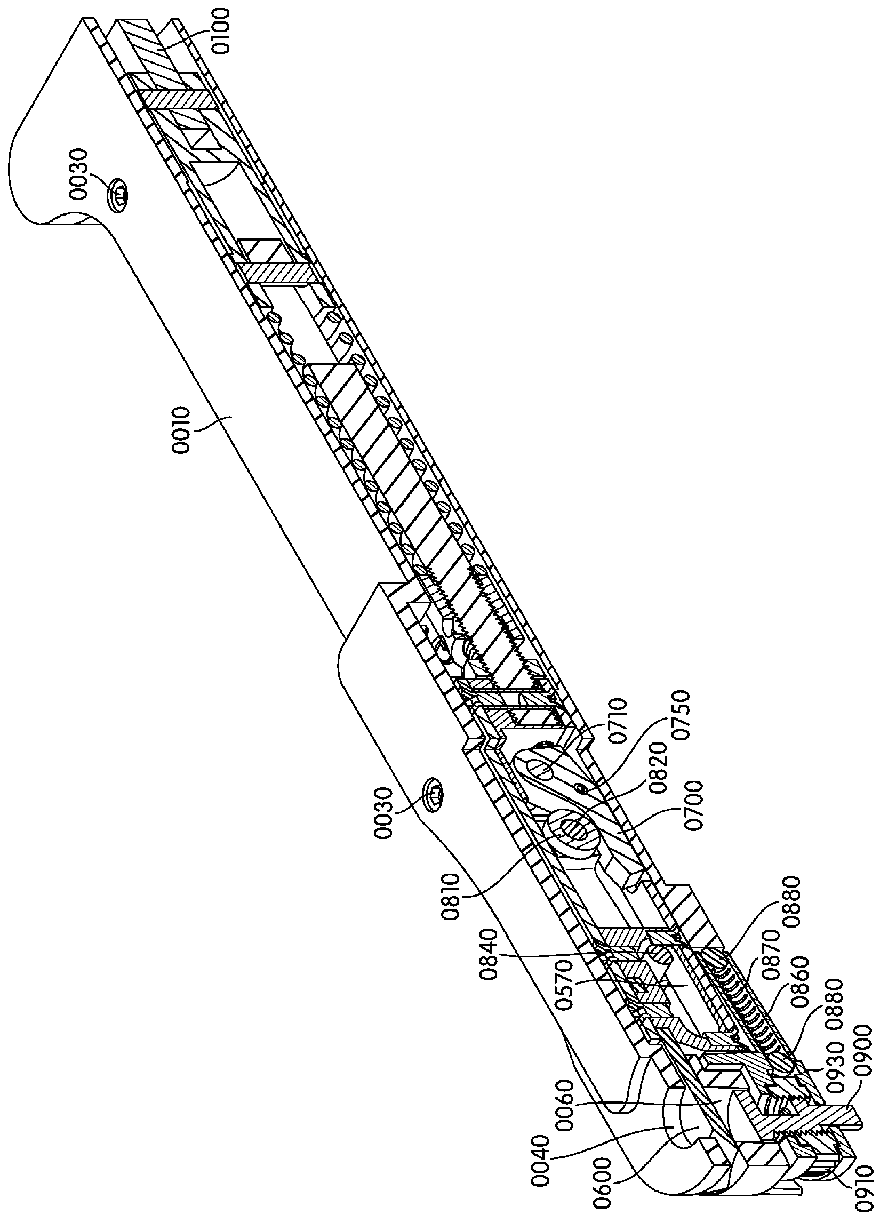
[0017] FIG. 7 is a sectional view drawing of a clipper body assembly with the blade in a non-retracted position in accordance with a preferred embodiment of the present invention.
[0018] FIG. 8 is a second sectional view drawing of a clipper body assembly with the blade in a non-retracted position in accordance with a preferred embodiment of the present invention.
[0019] FIG. 9 is a third sectional view drawing of a clipper body assembly with the blade in a partially-retracted position in accordance with a preferred embodiment of the present invention.
[0020] FIG. 10 is a fourth sectional view drawing of a clipper body assembly with the blade in a fully-retracted position in accordance with a preferred embodiment of the present invention.
[0021] FIG. 11 is a fifth sectional view drawing of a clipper body assembly with the blade in a fully-retracted position in accordance with a preferred embodiment of the present invention.
[0022] FIG. 12 is a sixth sectional view drawing of a clipper body assembly with the blade in a fully-retracted position in accordance with a preferred embodiment of the present invention.
[0023] FIG. 13 is a seventh sectional view drawing of a clipper body assembly with the blade in a fully-retracted position in accordance with a preferred embodiment of the present invention.
[0024] FIG. 14 is an eighth sectional view drawing of a clipper body assembly with the blade in a partially-retracted position in accordance with a preferred embodiment of the present invention.
[0025] FIG. 15 is a ninth sectional view drawing of a clipper body assembly with the blade in a non-retracted position in accordance with a preferred embodiment of the present invention.
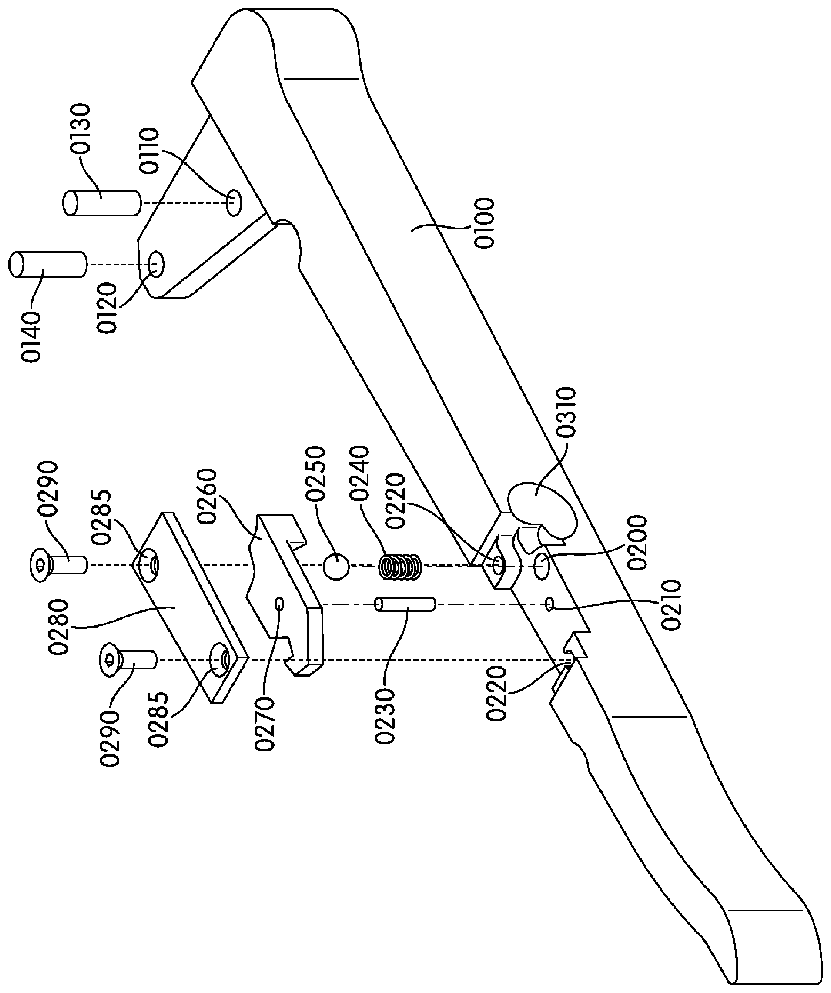
[0026] FIG. 16 is an exploded view drawing of a clipper handle assembly in accordance with a preferred embodiment of the present invention.
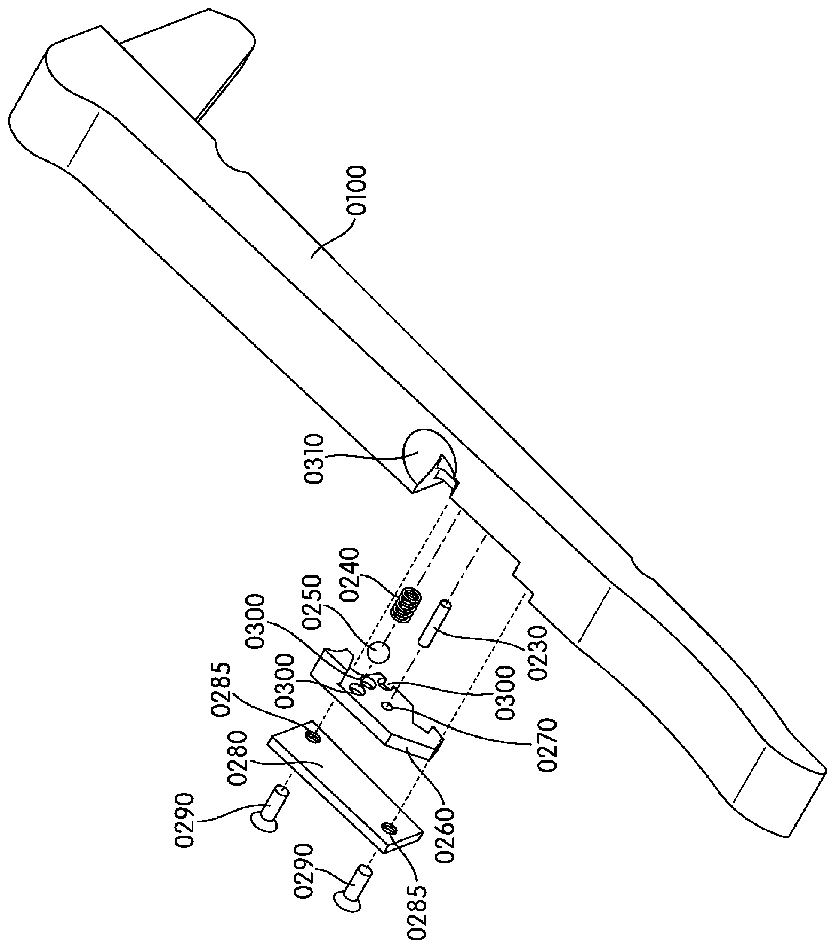
[0027] FIG. 17 is an exploded view drawing of a clipper handle assembly in accordance with a preferred embodiment of the present invention.
[0028] FIG. 18A is a top view drawing of a clipper handle assembly with the hook fully extended in accordance with a preferred embodiment of the present invention.
[0029] FIG. 18B is a top view drawing of a clipper handle assembly with the hook partially extended in accordance with a preferred embodiment of the present invention.
[0030] FIG. 18C is a top view drawing of a clipper handle assembly with the hook retracted in accordance with a preferred embodiment of the present invention.
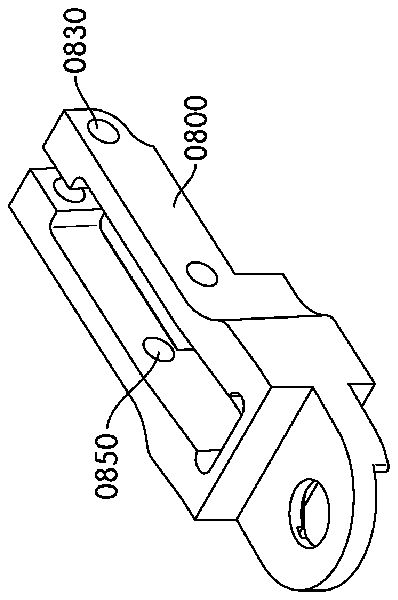
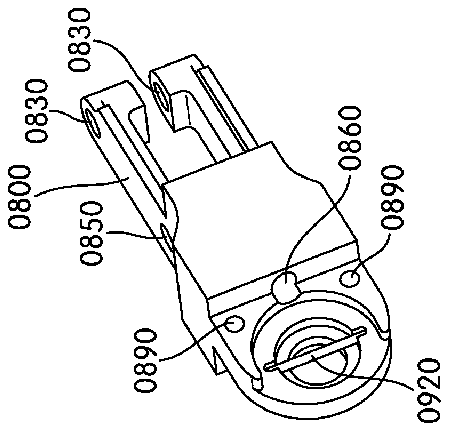
[0031] FIG. 19 is an exploded view of a trigger assembly in accordance with a preferred embodiment of the present invention.
[0032] FIG. 19A is a perspective view of a trigger body in accordance with a preferred embodiment of the present invention.
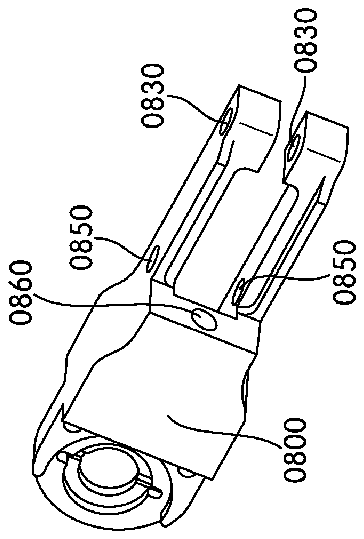
[0033] FIG. 19B is a second perspective view of a trigger body in accordance with a preferred embodiment of the present invention.
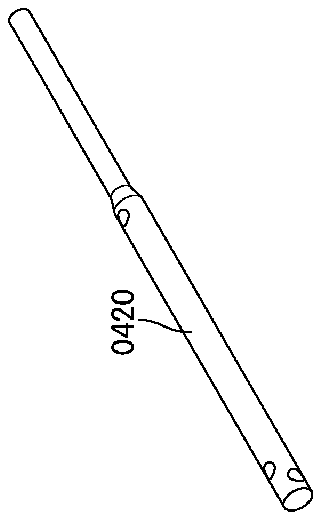
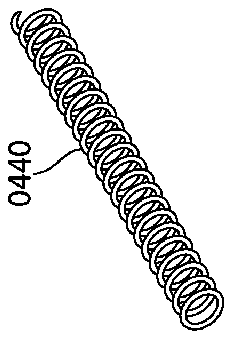
[0034] FIG. 20 is an exploded view of a handle return assembly in accordance with a preferred embodiment of the present invention.
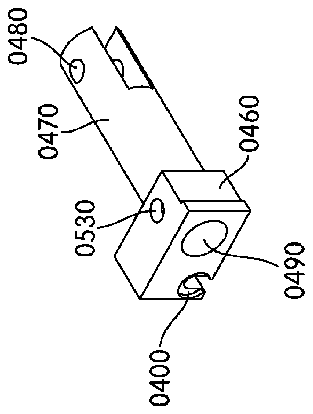
[0035] FIG. 21 is an exploded view of a pushing rod assembly in accordance with a preferred embodiment of the present invention.
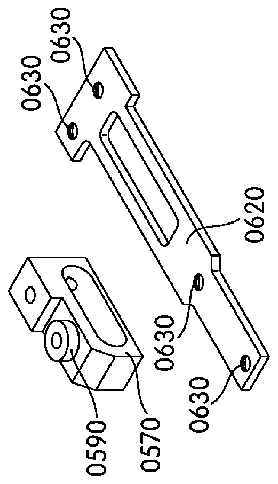
[0036] FIG. 22 is an exploded view of a blade holder assembly in accordance with a preferred embodiment of the present invention.
[0037] FIG. 22A is a second exploded view of a blade holder assembly in accordance with a preferred embodiment of the present invention.
[0038] FIG. 22B is a third exploded view of a blade holder assembly in accordance with a preferred embodiment of the present invention.
[0039] FIG. 23 is an exploded view of a stopper assembly in accordance with a preferred embodiment of the present invention.
[0040] FIG. 24 is an exploded view of a trigger sub assembly in accordance with a preferred embodiment of the present invention.
PARTS LISTING
[0000]
Clipper Body Assembly
0010 Cover Plate
0020 Cover Plate Screw Holes
0030 Socket Head Screws
0040 Cover Plate Nail Engagement Receptacle
0050 Clipper Main Body
0060 Clipper Main Body Nail Engagement Receptacle
0070 Connecting Anchor Connecting Pin Hole
0080 Hook Receptacle
0090 Clipper Main Body Trigger Pivot Pin Hole
Clipper Handle Assembly
0100 Handle Body
0110 Handle Connecting Pin Receptacle
0120 Handle Pivot Pin Receptacle
0130 Handle Connecting Pin
0140 Handle Pivot Pin
Clipper Handle Latch Assembly
0200 Spring Receptacle
0210 Shaft Receptacle
0220 Hook Cover Plate Screw Receptacle
0230 Shaft
0240 Hook Spring
0250 Ball Bearing
0260 Hook
0270 Hook Shaft Receptacle
0280 Hook Cover Plate
0285 Hook Cover Plate Screw Hole
0290 Flat head screw
0300 Indent
0310 Sphere
Handle Return Assembly
0400 Handle Return Spring Guide Receptacle
0410 Handle Return Spring Guide Pin
0420 Handle Return Spring Guide
0430 Handle Return Spring Guide Bushing
0440 Handle Return Spring
Pushing Rod Assembly
0460 Pushing Link
0470 Pushing Link Rod
0480 Pushing Link Connecting Pin Receptacle
0490 Pushing Link Rod Receptacle
0500 Pushing Rod Hole
0510 Pushing Rod
0515 Pushing Rod Pin
0520 Pushing Rod Slot
0525 Pushing Link Pin
0530 Pushing Link Pin Hole
0535 Blade Spring
0540 Blade Spring Tension Adjustment Screw
Blade Holder Assembly
0560 Joint Stopper Holder
0565 Pushing Rod Pin Hole
0570 Blade Holder
0580 Flat Head Screws
0590 Blade Holder Cylinder
0600 Blade
0610 Blade Mounting Hole
0620 Blade Holder Lower Plate
0630 Blade Lower Plate Holes
0640 Blade Holder Upper Plate
0650 Blade Holder Upper Plate Holes
Stopper Assembly
0700 Stopper
0710 Stopper Pivot Pin
0720 Stopper Pivot Pin Hole
0730 Stopper Spring
0740 Stopper Spring Screw
0750 Stopper Stop Pin
0760 Stopper Stop Pin Hole
0765 Stopper Stop Pin Notch
Trigger Assembly
0800 Trigger Main Body
0810 Trigger Ball Bearing
0820 Trigger Ball Bearing Pin
0830 Trigger Ball Bearing Pin Hole
0840 Trigger Pivot Pin
0850 Trigger Pivot Pin Hole
0860 Trigger Spring Hole
0870 Trigger Spring
0880 Trigger Bearing Ball
0890 Trigger Bottom Plate Screw Receptacle
Trigger Sub Assembly
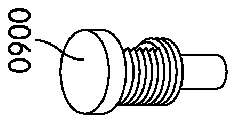
0900 Depth Adjuster
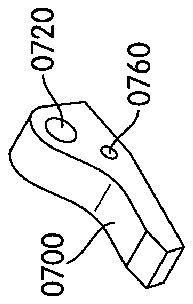
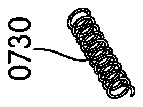
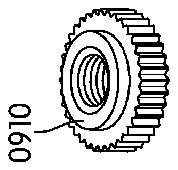
0910 Depth Adjustment Screw
0920 Depth Adjuster Spin Preventer Pin
0930 Trigger Bottom Plate
0940 Trigger Bottom Plate Screw Hole
0950 Trigger Bottom Plate Screw
DESCRIPTION OF PREFERRED EMBODIMENTS
[0129] A detailed description of the present invention follows. Referring to FIGS. 1 through 24 , a pressure activated clipper is comprised of a Clipper Body Assembly, Clipper Handle Assembly, Clipper Handle Latch Assembly, Handle Return Assembly, Pushing Rod Assembly, Blade Holder Assembly, Stopper Assembly, Trigger Assembly and Trigger Sub Assembly.
Clipper Body Assembly
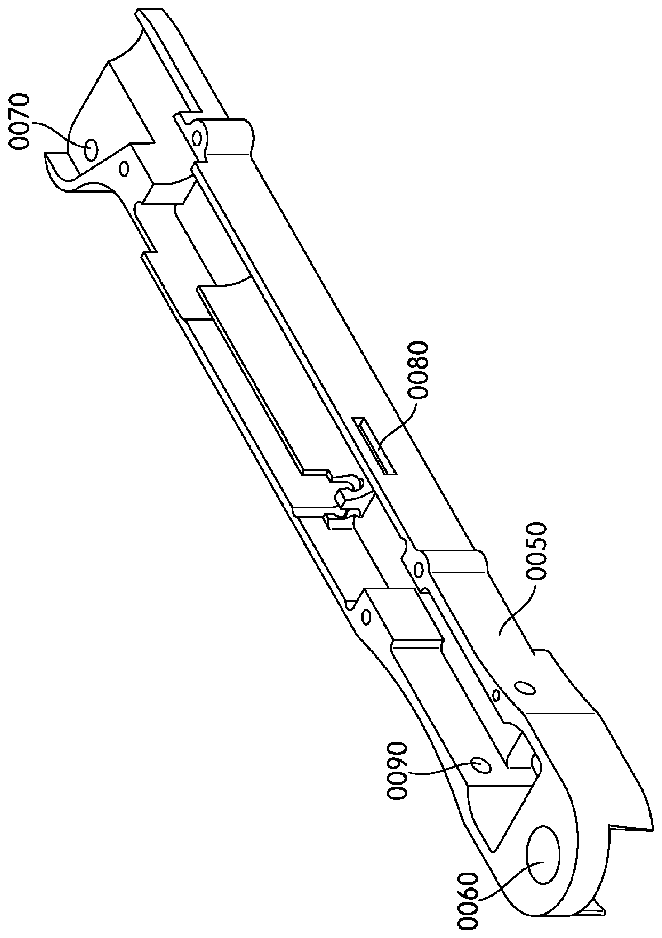
[0130] The Clipper Body Assembly consists of a Cover Plate 0010 containing Cover Plate Screw Holes 0020 that receive Socket Head Screws 0030 as well as a Cover Plate Nail Engagement Receptacle 0040 . The Clipper Body Assembly also consists of a Clipper Main Body 0050 containing a Clipper Main Body Nail Engagement Receptacle 0060 as well as a Connecting Anchor Connecting Pin Hole 0070 , a Hook Receptacle 0080 and a Clipper Main Body Trigger Pivot Pin Hole 0090 .
Clipper Handle Assembly
[0131] The Clipper Handle Assembly consists of a Handle Body 0100 containing a Handle Connecting Pin Receptacle 0110 , a Handle Pivot Pin Receptacle 0120 , a Handle Connecting Pin 0130 and a Handle Pivot Pin 0140 .
Clipper Handle Latch Assembly
[0132] The Clipper Handle Latch Assembly consists of a Spring Receptacle 0200 , a Shaft Receptacle 0210 and a Hook Cover Plate Screw Receptacle 0220 , which contain a Shaft 0230 , a Hook Spring 0240 , Ball Bearing 0250 , Hook 0260 , Hook Shaft Receptacle 0270 . The Clipper Handle Latch Assembly is covered by a Hook Cover Plate 0280 containing a Hook Cover Plate Screw Hole 0285 designed to receive a Flat head screw 0290 . The Clipper Handle Latch Assembly also contains Indents 0300 and a Sphere 0310 .
Handle Return Assembly
[0133] The Handle Return Assembly consists of a Handle Return Spring Guide Receptacle 0400 , which serves as a nest for the Handle Return Spring 0440 and as a retainer for the Handle Return Spring Guide 0420 . A Handle Return Spring Guide Pin 0410 positions the Handle Return Assembly in the Clipper Main Body 0050 , and stabilizes the Handle Return Spring Guide 0420 that serves as a container for the Handle Return Spring 0440 . The Handle Return Spring Guide Pin 0410 also serves as a stopper for the Handle Return Spring Guide Bushing 0430 . The Handle Return Spring Guide Bushing 0430 also stabilizes and serves as a seat for the Handle Return Spring 0440 . The Handle Return Spring Guide 0420 also directs pressure from the Handle Return Spring 0440 against the Pushing Link 0460 as part of the Pushing Rod Assembly.
Pushing Rod Assembly
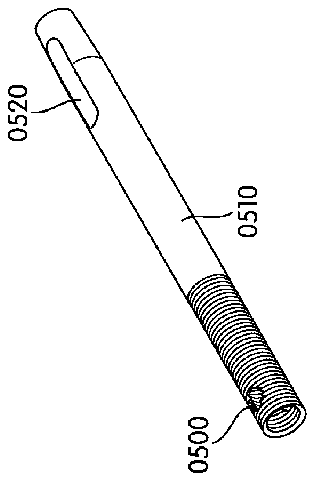
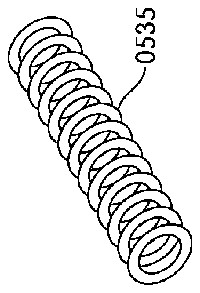
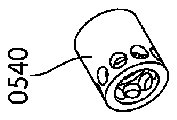
[0134] The Pushing Rod Assembly consists of a Pushing Link 0460 , which consists of a Pushing Link Rod 0470 , and contains a Pushing Link Connecting Pin Receptacle 0480 that also serves as a Pushing Link Pin 0525 holder. The Pushing Link also contains a Pushing Link Rod Receptacle 0490 . The Pushing Rod Assembly also consists of a Pushing Rod Hole 0500 that serves as a Pushing Rod Pin Holder 0515 as part of a Pushing Rod 0510 . The Pushing Rod 0510 serves as a Blade Spring 0535 holder and functions as a connector between the Pushing Rod Assembly and the Blade Holder Assembly. The Pushing Link Rod 0470 is hollow in order to provide a guide for the Pushing Rod 0510 . The Pushing Rod Pin 0515 also serves as a connector between the Pushing Rod 0510 and Joint Stopper Holder 0560 , and also interfaces with the Blade Holder Assembly. The Pushing Rod also consists of a Pushing Rod Slot 0520 that allows the Pushing Rod 0510 to travel inside the Pushing Link Rod 0470 . A Pushing Link Pin 0525 that prevents the Pushing Rod 0510 from separating from the Pushing Link 0460 is also designed to fit into Pushing Link Pin Hole 0530 . A Blade Spring 0535 provides a force needed to activate the Blade Holder Assembly to cut nails and to contain spring tension energy when the clipper is in a cocked intermediate position. A Blade Spring Tension Adjustment Screw 0540 functions as an adjustable regulator for the cutting force of the Blade Spring 0535 . The main purpose of the Pushing Link 0460 is to be a Blade Spring 0535 compressor.
Blade Holder Assembly
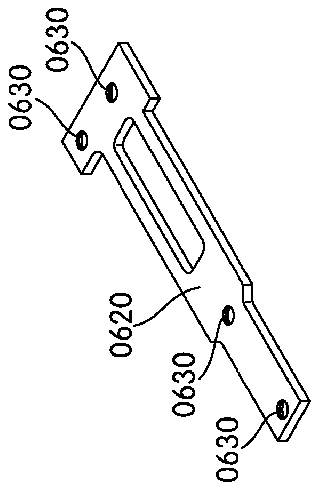
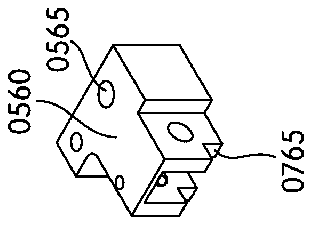
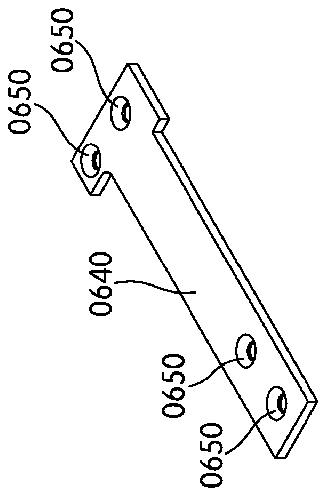
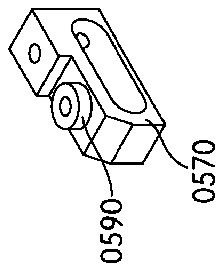
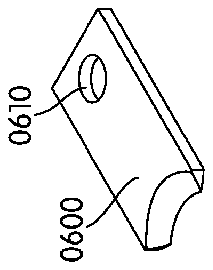
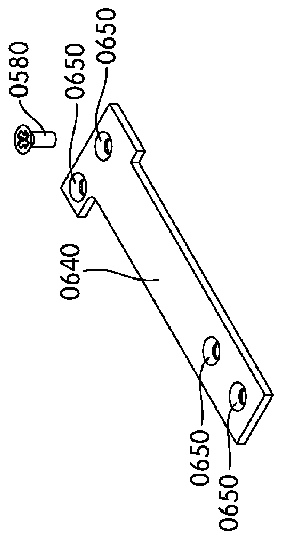
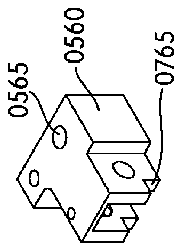
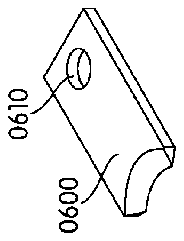
[0135] The Blade Holder Assembly consists of a Joint Stopper Holder 0560 containing a Pushing Rod Pin Hole 0565 that connects the Pushing Rod 0510 and Joint Stopper Holder 0560 . The Joint Stopper Holder 0560 also functions as a holder for the Stopper 0700 and as a connector for the pushing rod assembly with the Blade Holder Assembly. The Blade Holder Assembly also consists of a Blade Holder 0570 that the Blade 0600 is attached to. The Blade Holder Assembly is secured by multiple Flat Head Screws 0580 . A Blade Holder Cylinder 0590 functions as an attachment point between the Blade Holder 0570 and the Blade 0600 . The Blade 0600 contains a Blade Mounting Hole 0610 which serves as a receptacle for the Blade Holder Cylinder 0590 . A Blade Holder Lower Plate 0620 serves as a connector between the Joint Stopper Holder 0560 and Blade Holder 0570 . The Blade Holder Lower Plate 0620 contains Blade Lower Plate Holes 0630 that receive the Flat Head Screws 0580 . A Blade Holder Upper Plate 0640 , serves as a second connector between the Joint Stopper Holder 0560 and Blade Holder 0570 . The Blade Holder Upper Plate 0640 also contains Blade Holder Upper Plate Holes 0650 to receive the Flat Head Screws 0580 .
Stopper Assembly
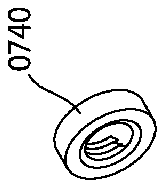
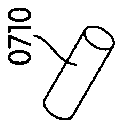
[0136] The Stopper Assembly consists of a Stopper 0700 that enables the Blade Spring 0535 to be compressed and functions to hold the Blade Holder Assembly in a loaded state. A Stopper Pivot Pin 0710 that mounts Stopper 700 in the Joint Stopper Holder 0560 is received by a Stopper Pivot Pin Hole 0720 . A Stopper Spring 0730 serves as a force that makes the Stopper 0700 rotate upwards and around the Stopper Pivot Pin 0710 . A Stopper Spring Screw 0740 serves as a container for the Stopper Spring 0730 . The Stopper Assembly also consists of a Stopper Stop Pin 0750 that positions the Stopper 0700 by stopping it in a precise location after its movement upwards. The Stopper Stop Pin 0750 is received by a Stopper Stop Pin Hole 0760 receptacle and fits into a Stopper Stop Pin Notch 0765 , which serves as a resting wall for the Stopper Stop Pin 0750 and provides stability for the Stopper Assembly.
Trigger Assembly
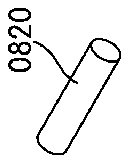
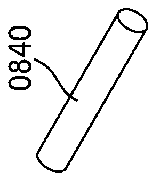
[0137] The Trigger Assembly consists of a Trigger Main Body 0800 that functions as a holder for the Trigger Assembly components, Trigger Sub Assembly components, and functions to both cock the clipper and initiate a cutting action by releasing the Blade Holder Assembly from its cocked position. The Trigger Main Body 0800 also contains a Trigger Ball Bearing 0810 that serves as a counter-force for the Stopper 0700 and makes releasing the Blade Holder Assembly from its cocked position effortless. The Trigger Ball Bearing 0810 is positioned in the Trigger Main Body 0800 by a Trigger Ball Bearing Pin 0820 that extends through Trigger Ball Bearing Pin Holes 0830 . A Trigger Pivot Pin 0840 that allows the Trigger Assembly to rotate and positions the Trigger Assembly in the Clipper Main Body 0050 , by being mounted in the Clipper Main Body Trigger Pivot Pin Holes 0090 , is received by Trigger Pivot Pin Holes 0850 . The Trigger Spring Hole 0860 serves as a housing for the Trigger Spring 0870 that has a Trigger Bearing Ball 0880 on each end of it. The Trigger Spring 0870 serves as force that turns and keeps the Trigger Assembly in an upright position. The Trigger Spring 0870 also provides friction and holding force for the Depth Adjustment Screw 0910 . The Trigger Main Body 0800 has Trigger Bottom Plate Screw Receptacles 0890 , which receive Trigger Bottom Plate Screws 0950 .
Trigger Sub Assembly
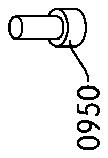
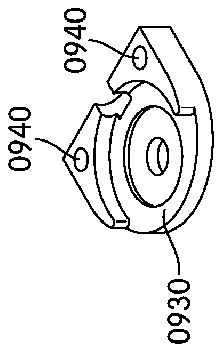
[0138] The Trigger Sub Assembly consists of a Depth Adjuster 0900 that dictates what length of the nail or the claw is allowed into the Clipper Main Body Nail Engagement Receptacle 0060 and acts as a striking element for activating the Trigger Assembly. A Depth Adjustment Screw 0910 regulates the position of the Depth Adjuster 0900 . The Trigger Sub Assembly is stabilized and prevented from torsional rotation by a Depth Adjuster Spin Preventer Pin 0920 which prevents the Depth Adjuster 0900 from spinning while the Depth Adjustment Screw 0910 is being spun around it, causing the Depth Adjuster 0900 to be forced up or down based upon the spinning direction of the Depth Adjustment Screw 0910 . The Trigger Sub Assembly is anchored and secured by a Trigger Bottom Plate 0930 containing Trigger Bottom Plate Screw Holes 0940 , each of which is intended to receive a Trigger Bottom Plate Screw 0950 .
Clipper Motion
General Overview
Initial Preparation of the Clipper:
[0139] Turning the Hook 0260 to the Middle Indent 0300 permits the Handle Body 0100 to go all the way open. The Handle Return Spring 0440 serves to push the Pushing Link 0460 . The Pushing Link 0460 will then swing the handle open. During this process, the Stopper 0700 travels under the Trigger Ball Bearing 0810 (See FIG. 9 ) until it passes the Trigger Ban Bearing 0810 (See FIG. 10 ). Now the Stopper Spring 0730 pushes the Stopper 0700 up until the Stopper Stop Pin 0750 hits the Stopper Stop Pin Notch 0765 . At the same time, the Trigger Spring 0870 swings the Trigger Assembly clockwise (See FIG. 10 ). The front of the Trigger Assembly is now stopped against the Clipper Main Body Nail Engagement Receptacle 0060 area (See FIGS. 10 , 11 , and 12 ), Now the Trigger Ball Bearing 0810 and Stopper 0700 are facing each other (head to head). The Depth Adjuster 0900 and Trigger Main Body 0800 are designed to have an adjustable configuration that is achieved by spinning the Depth. Adjustment Screw 0910 . By spinning the Depth Adjustment Screw 0910 either clockwise or counterclockwise, the Depth Adjuster 0900 travels either up or down within the Trigger Main Body 0800 , and as a result, creates a varying amount of space between the top of the Clipper Main Body Nail Engagement Receptacle 0060 and the top of the Depth Adjuster 0900 . This space dictates how much of the nail or claw can be inserted into the Cover Plate Nail Engagement Receptacle 0040 and further into the Clipper Main Body Nail Receptacle 0060 . Once the Depth Adjustment Screw 0910 is adjusted by the user to the desired position, the Depth Adjuster 0900 and Trigger Main Body 0800 function as a solid unit to cut the nail or claw to a desired length. Adjusting the depth can be done during this initial preparation process, before attempting to cut a nail or claw. This depth adjustment process can also easily be repeated before cutting each individual nail or claw if achieving different lengths of cuts is desired.
Loading (Cocking) the Clipper:
[0140] The initial geometry of the Trigger Pivot Pin 0840 , Trigger Ball Bearing Pin 0820 , and Stopper Pivot Pin 0710 is crucial to facilitate initial movement of the clipper mechanism, such that if you draw a straight line between the centers of the Trigger Pivot Pin 0840 and Stopper Pivot Pin 0710 , the center of the Trigger Ball Bearing 0810 will be slightly above that line (See FIG. 9 ). The subsequent geometry of the Trigger Pivot Pin 0840 , Trigger Ball Bearing Pin 0820 , and Stopper Pivot Pin 0710 is similarly crucial to facilitate continued movement of the clipper mechanism, such that if you draw a straight line between centers of the Trigger Pivot Pin 0840 and Stopper Pivot Pin 0710 , the center of the Trigger Ball Bearing 0810 will be slightly below that line (See FIGS. 10 , 11 , and 12 ). This subsequent unique geometry means that if you apply pressure between the Stopper 0700 and Trigger Ball Bearing 0810 , that pressure will force the Trigger Assembly into a clockwise motion that forces the Trigger Assembly into remaining pressed against the Clipper Main Body 0050 . This same pressure also forces the Stopper 0700 to remain in an up position. By enabling the Handle Body 0100 to swing open, the Blade Holder Assembly is retracted backwards. As a result, the Blade 0600 then allows access for the nail or claw to be inserted into the Cover Plate Nail Engagement Receptacle 0040 and into the Clipper Main Body Nail Engagement Receptacle 0060 . Squeezing the Handle Body 0100 causes the Trigger Ball Bearing 0810 and Stopper 0700 to come into contact against each other. As a result, the Blade Holder Assembly cannot be moved forward, but the Blade Spring 0535 can be compressed by squeezing the Handle Body 0100 . Squeezing the Handle Body 0100 causes the Pushing Link 0460 to go forward while the Blade Holder Assembly remains stationary. The Pushing Rod 0510 slides inside the Pushing Link Rod Receptacle 0490 . As a result, the Blade Spring 0535 is compressed (See FIGS. 11 and 12 ).
[0141] Squeezing the Handle Body 0100 even farther causes the pressure to mount between the Trigger Ball Bearing 0810 and the face of the Stopper 0700 . To maintain an inline position between the Trigger Pivot Pin 0840 , Trigger Ball Bearing 0810 and Stopper Pivot Pin 0710 , the angle of the face of the Stopper 0700 must be machined so that it is 90 degrees to a line drawn between the Trigger Pivot Pin 0840 , Trigger Ball Bearing pin 0820 and Stopper Pivot Pin 0710 . This configuration guarantees that no matter how high the pressure is between the Trigger Ball Bearing 0810 and Stopper 0700 , the Trigger Assembly and the Stopper Assembly will remain in this configuration until the Handle Body 0100 is fully squeezed and the Blade Spring 0535 is compressed. However, at a 90-degrees configuration during cocking, the Trigger Assembly becomes very sensitive, so much that a mere tap against anything could torque the Trigger Assembly counter clockwise, activating it and causing the Blade Holder Assembly to shoot forward prematurely. In order to reduce the sensitivity of the Trigger Assembly and ensure that the Trigger Assembly and the Stopper 0700 remain in proper configuration when the Trigger Pivot Pin 0840 , Trigger Ball Bearing 0810 and Stopper Pivot Pin 0710 are in line while the spring is being compressed, the Stopper 0700 face angle measured from the bottom must be increased slightly. By increasing the Stopper 0700 face angle slightly as measured from the bottom, the Trigger Ball Bearing 0810 is forced to migrate downwards and Stopper 0700 is forced upwards. Those forces also cause the Trigger Assembly and Stopper 0700 to rotate clockwise resulting in the Trigger Assembly being pressed against the Clipper Main Body 0050 , and the Stopper Stop Pin 0750 being pressed against the Joint Stopper Holder 0560 . The clockwise forces of the Trigger Assembly and Stopper 0700 are related to the size of the Stopper 0700 face angle. The higher the Stopper 0700 face angle, the stronger the resulting clockwise force is. A higher angle results in a larger clockwise force, making the Trigger Assembly more difficult to activate. The optimum range of Stopper 0700 face angles for proper device function is 1 to 4 degrees, past the neutral 90-degree angle. A 4-degree angle past a neutral 90-degree angle results in the highest Trigger tension with the lowest activation sensitivity, while a 1-degree angle past a neutral 90-degree angle results in the Trigger having higher sensitivity to being activated. The clipper can be configured for different animal sizes and situations by installing the Stopper 0700 with different face angles.
Cutting Nails:
[0142] By inserting a nail or claw into the Clipper Main Body Nail Engagement Receptacle 0060 , it makes contact with the Depth Adjuster 0900 . Pressure against the Depth Adjuster 0900 causes the Trigger Assembly to rotate counter clockwise (See FIG. 13 ). The Trigger Ball Bearing 0810 travels up until it finds itself above the Stopper 0700 (See FIG. 14 ). Now the loaded Blade Holder Assembly shoots forward (See FIGS. 14 and 15 ) and the nail is cut, such that the nail is contained inside the Clipper Main Body Nail Engagement Receptacle 0060 between the Depth Adjuster 0900 and the Blade 0600 . Once fired, the Return Spring 0440 allows the Handle Body 0100 to retract, and the Blade Holder Assembly retracts, The cut nail or claw can be removed from the Clipper Main Body Nail Engagement Receptacle 0060 through rapid inversion of the entire apparatus. The entire apparatus is then ready for another cycle. This cycle can be repeated very quickly (at about 2 second increments if necessary).
Specific Motion Steps
1) Closed and Locked Position:
Details of Motion
[0143] In the closed and locked position as shown in FIG. 3 and FIG. 4 , the Handle Body 0100 is secured to the Clipper Main Body 0050 by a Hook 0260 , visible in FIG. 16 and FIG. 17 , contained within the Clipper Latch Assembly that engages into and secures the Hook Receptacle 0080 , which is visible in FIG. 1 . The Hook 0260 serves as a device that holds the handle assembly for storage and marketing appearance. The Hook 0260 also serves as a safety device, as it can only be inserted into Hook Receptacle 0080 if the Blade Holder Assembly is moved forward to the position when the Blade 0600 is covering the Clipper Main Body Nail Engagement Receptacle 0060 and the Pushing Rod Assembly is in a released position, with Blade Spring 0535 in the relaxed phase. As shown in FIG. 7 and FIG. 8 , the Blade 0600 is in a non-retracted position, completely blocking the Cover Plate Nail Engagement Receptacle 0040 from receiving a nail or claw further into the Clipper Main Body Nail Engagement Receptacle 0060 . The Sphere 0310 on the Handle Body 0100 enables a user to use a fingernail to reach the retracted Hook 0260 , as shown in FIG. 18C and articulate the Hook 0260 with a continuous pulling motion as depicted in FIG. 18B , where the Hook 0260 is in the Middle Indent 0300 position, into a ready and fully extended position as depicted in FIG. 18A . The Hook 0260 is received and secured by the Hook Receptacle 0080 when articulating the Handle Body 0100 , putting the device into a first or closed position.
2) Open and Ready Position:
Details of Motion
[0144] In the open or ready position as shown in FIG. 1 , the user has already separated the Handle Body 0100 from the Clipper Main Body 0050 by disengaging the Hook 0260 visible in FIG. 16 and FIG. 17 , from the Hook Receptacle 0080 in the Clipper Main Body 0050 visible in FIG. 1 . The Sphere 0310 on the Handle Body 0100 enables a user to use a fingernail to reach the extended and secured Hook 0080 and articulate the Hook 0260 to disengage it from the Hook Receptacle 0080 . When the Hook 0260 is disengaged from the Hook Receptacle 0080 , permitting the Handle Body 0100 to articulate away from the Clipper Main Body 0050 , the device enters the Second or Ready Position as shown in FIG. 1 .
[0145] The user is able to articulate the Hook 0260 between the extended position in FIG. 18A with a continuous pushing motion which articulates the Hook 0260 as depicted in FIG. 18B . The user is able to store the Hook 0260 in a retracted position as depicted in FIG. 18C and FIG. 1 , wherein the Hook 0260 is completely refracted underneath the Hook Cover Plate 0280 and aligned flush so as not to extend past the vertical boundary of the Handle Body 0100 , as depicted in FIG. 18C and FIG. 1 . The Hook 0260 can be manipulated from an extended position to a refracted position through the articulating motion of the Hook 0260 around the axis of the Shaft 0230 . The Indents 0300 as depicted in FIG. 17 are small spherical indentations in the underside of the Hook 0260 , which receive a Ball Bearing 0250 . When a user articulates the Hook 0260 from an extended position to a retracted position and vice-versa, this Ball Bearing 0250 moves from one indent to the other to secure and maintain the Hook 0260 in the position desired by the user. This Hook 0260 articulation process is depicted in FIG. 18A (extended), FIG. 18B (partially-retracted) and FIG. 18C (fully-retracted).
[0146] As shown in FIG. 7 and FIG. 8 , the Blade 0600 is in a non-retracted position, completely blocking the Cover Plate Nail Engagement Receptacle 0040 from receiving a nail or claw even further into the Clipper Main Body Nail Engagement Receptacle 0060 .
[0147] As shown in FIG. 7 and FIG. 8 , the Blade Holder 0570 is in the non-retracted position and the Trigger Ball Bearing 0810 is resting upon the Stopper 0700 in the initial position.
[0148] As shown in FIG. 7 and FIG. 8 , the upper round portion of the Depth Adjuster 0900 is in a resting position on top of the Trigger Main Body 0800 .
3) First-Intermediate Position as the User Allows the Clipper Handle to Swing Open: Details of Motion
[0149] The First-Intermediate Position is attained as the user enables articulation of the Handle Body 0100 around the axis of the Handle Pivot Pin 0140 . Articulation is achieved by Handle Return Spring 0440 force. As shown in FIG. 9 , the Blade 0600 is in a partially-retracted position, partially blocking the Cover Plate Nail Engagement Receptacle 0040 from receiving a nail or claw further into the Clipper Main Body Nail Engagement Receptacle 0060 .
[0150] As shown in FIG. 9 , the Blade Holder 0570 is in a partially-retracted position and Stopper 0700 has moved under the Trigger Ball Bearing 0810 .
[0151] During this process, the Handle Return Spring 0440 is pushing the Rushing Link 0460 . The Pushing Link 0460 begins to swing the Handle Body 0100 open. During this process, the Stopper 0700 begins to travel under the Trigger Ball Bearing 0810 (See FIG. 9 ) until it will pass the Trigger Ball Bearing 0810 (See FIG. 10 ). The Stopper Spring 0730 will then be able to push the Stopper 0700 up until the Stopper Stop Pin 0750 hits the Stopper Stop Pin Notch 0765 .
[0152] At the same time, the Trigger Spring 0870 begins to swing the Trigger Assembly clockwise (See FIG. 10 ) until the front of the Trigger Assembly would stop against the Clipper Main Body Nail Engagement Receptacle 0060 area (See FIGS. 10 , 11 , and 12 ). At that point, the Trigger Ball Bearing 0810 and Stopper 0700 would be facing each other (head to head).
[0153] As shown in FIG. 9 , the geometry of the Trigger Pivot Pin 0840 , Trigger Ball Bearing Pin 0820 , and Stopper Pivot Pin 0710 are crucial to facilitate movement of the clipper to the First-Intermediate Position, such that if a straight line was drawn between the centers of the Trigger Pivot Pin 0840 and Stopper Pivot Pin 0710 , the center of the Trigger Ball Bearing 0810 would be slightly above that drawn straight line. This unique geometry means that if pressure was applied between the Stopper and Trigger Ball Bearing, that pressure would force the Trigger Assembly into a clockwise motion that forces the Trigger into remaining pressed against the Clipper Main Body 0050 . This same pressure also would force the Stopper 0700 to remain in an up position. By enabling the Handle Body 0100 to swing open, the Blade Holder Assembly is actually retracted backwards. The Blade 0600 then would allow access for the nail to be inserted through the Cover Plate Nail Engagement Receptacle 0040 and into the Clipper Main Body Nail Engagement Receptacle 0060 .
[0154] With the Trigger Ball Bearing 0810 and Stopper 0700 against each other, the Blade Holder Assembly cannot be moved forward, but the Blade Spring 0535 can be compressed by squeezing the Handle Body 0100 . Squeezing the Handle Body 0100 will cause the Pushing Link 0460 to go forward while the Blade Holder Assembly remains stationary. The Pushing Rod 0510 would slide inside the Pushing Link Rod Receptacle 0490 . As a result, the Blade Spring 0535 would be compressed (See FIGS. 11 and 12 ).
4) Second Intermediate Position:
Details of Motion
[0155] The Second-Intermediate Position is attained as the user pulls and applies further sufficient rotational force for additional separation and articulation of the Handle Body 0100 around the axis of the Handle Pivot Pin 0140 . As a result and as shown in FIG. 10 , the Blade 0600 has moved to a completely retracted position, permitting the Cover Plate Nail Engagement Receptacle 0040 to receive a nail or claw completely into the Clipper Main Body Nail Engagement Receptacle 0060 .
[0156] As shown in FIG. 10 , the Blade Holder 0570 is in the completely-retracted position and the Trigger Ball Bearing 0810 is off the Stopper 0700 . As a result, the Stopper is able to rotate to a first position around the axis of the Stopper Pivot Pin 0710 as shown in FIG. 10 .
[0157] As shown in FIG. 10 , the Depth Adjuster 0900 has moved upwards to a ready position resulting in a space cavity underneath between it and the top of the Trigger Main Body 0800 within the Clipper Main Body Receptacle, permitting downward movement of the Depth Adjuster 0700 .
[0158] The Handle Return Spring 0440 continues to push the Pushing Link 0460 . The Pushing Link 0460 continues to swing the handle open. During this process, the Stopper 0700 continues to travel under the Trigger Ball Bearing 0810 (See FIG. 9 ) until it passes the Trigger Bali Bearing 0810 (See FIG. 10 ). The Stopper Spring 0730 can then push the Stopper 0700 up until the Stopper Stop Pin 0750 hits the Stopper Stop Pin Notch 0765 .
[0159] At the same time, the Trigger Spring 0870 continues to swing the Trigger Assembly clockwise (See FIG. 10 ) until the front of the Trigger Assembly would stop against the Clipper Main Body Nail Engagement Receptacle 0060 area (See FIGS. 10 , 11 , and 12 ). At that point, the Trigger Ball Bearing 0810 and Stopper 0700 would be facing each other (head to head).
[0160] As shown in FIG. 10 , the geometry of the Trigger Pivot Pin 0840 , Trigger Ball Bearing Pin 0820 , and Stopper Pivot Pin 0710 are crucial to facilitate movement of the clipper to the Second-Intermediate Position, such that if a straight line was drawn between the centers of the Trigger Pivot Pin 0840 and Stopper Pivot Pin 0710 , the center of the Trigger Ball Bearing 0810 would be slightly below that drawn straight line. This unique geometry means that if pressure was applied between the Stopper 0700 and Trigger Ball Bearing 0810 , that pressure would force the Trigger Assembly into a clockwise motion that forces the Trigger Main Body 0800 into remaining pressed against the Clipper Main Body 0050 . This same pressure also would force the Stopper 0700 to remain in an up position. By enabling the Handle Body 0100 to swing open, the Blade Holder Assembly is actually retracted backwards. The Blade 0600 then would allow access for the nail to be inserted to the Cover Plate Nail Engagement Receptacle 0040 and further into the Clipper Main Body Nail Engagement Receptacle 0060 .
[0161] With the Trigger Ball Bearing 0810 and Stopper 0700 against each other, the Blade Holder Assembly cannot be moved forward, but the Blade Spring 0535 can be compressed by squeezing the Handle Body 0100 . Squeezing the handle will cause the Pushing Link 0460 to go forward while the Blade Holder Assembly remains stationary. The Pushing Rod 0510 would slide inside the Pushing Link Rod Receptacle 0490 . As a result, the Blade Spring 0535 is further compressed (See FIGS. 11 and 12 ).
5) Third Intermediate Position:
Details of Motion
[0162] The Third-Intermediate Position is attained when the Handle Body 0100 is in the fully swung open position about the axis of the Handle Pivot Pin 0140 . As shown in FIG. 11 , the Blade 0600 is in a completely retracted position, permitting the Cover Plate Nail Engagement Receptacle 0040 to receive a nail or claw completely into the Clipper Main Body Nail Engagement Receptacle 0060 .
[0163] As shown in FIG. 11 , the Blade Holder 0570 is in the completely-refracted position and the Trigger Ball Bearing 0810 is off the Stopper 0700 . The Stopper 0700 remains in a rotated up position around the axis of the Stopper Pivot Pin 0710 .
[0164] As shown in FIG. 11 , the Trigger Assembly has moved upwards to a ready position resulting in a space cavity underneath between Depth Adjuster 0900 and the top of the Trigger Main Body 0800 within the Clipper Main Body Nail Engagement Receptacle 0060 , permitting movement of the Trigger Assembly.
[0165] The Handle Return Spring 0440 continues to push the Pushing Link 0460 . The Pushing Link 0460 continues to swing the handle open. During this process, the Stopper 0700 continues to travel under the Trigger Ball Bearing 0810 (See FIG. 9 ) until it passes the Trigger Ball Bearing 0810 (See FIG. 10 ). The Stopper Spring 0730 can then push the Stopper 0700 up until the Stopper Stop Pin 0750 hits the Stopper Stop Pin Notch 0765 .
[0166] At the same time, the Trigger Spring 0870 continues to swing the Trigger Assembly clockwise (See FIG. 10 ) until the front of the Trigger Assembly would stop against the Clipper Main Body Nail Engagement Receptacle 0060 area (See FIGS. 10 , 11 , and 12 ). At that point, the Trigger Ball Bearing 0810 and Stopper 0700 would be facing each other (head to head).
[0167] As shown in FIG. 11 , the geometry of the Trigger Pivot Pin 0840 , Trigger Ball Bearing Pin 0820 , and Stopper Pivot Pin 0710 are crucial to facilitate movement of the clipper to the Third-Intermediate Position, such that if a straight line was drawn between the centers of the Trigger Pivot Pin 0840 and Stopper Pivot Pin 0710 , the center of the Trigger Ball Bearing 0810 would be slightly below that drawn straight line. This unique geometry means that if pressure was applied between the Stopper 0700 and Trigger Ball Bearing 0810 , that pressure would force the Trigger into a clockwise motion that forces the Trigger into remaining pressed against the Clipper Main Body 0050 . This same pressure also would force the Stopper 0700 to remain in an up position. By enabling the Handle Body 0100 to swing open, the Blade Holder Assembly is actually retracted backwards. The Blade 0600 then would allow access for the nail to be inserted through the Cover Plate Nail Engagement Receptacle 0040 and into the Clipper Main Body Nail Engagement Receptacle 0060 .
[0168] With the Trigger Ball Bearing 0810 and Stopper 0700 against each other, the Blade Holder Assembly cannot be moved forward, but the Blade Spring 0535 can be compressed by squeezing the Handle Body 0100 . Squeezing the Handle Body 0100 will cause the Pushing Link 0460 to go forward while the Blade Holder Assembly remains stationary. The Pushing Rod 0510 would slide inside the Pushing Link Rod Receptacle 0490 . As a result, the Blade Spring 0535 is further compressed (See FIGS. 11 and 12 ).
6) Fourth Intermediate Position:
Details of Motion
[0169] The Fourth-Intermediate Position is attained as the user pulls and applies sufficient rotational force for further articulation of the Handle Body 0100 as depicted in FIG. 1 . As shown in FIG. 12 , the Blade 0600 is in a completely retracted position, permitting the Cover Plate Nail Engagement Receptacle 0040 to receive a nail or claw further into the Clipper Main Body Nail Engagement Receptacle 0060 .
[0170] As shown in FIG. 12 , the Blade Holder 0570 is in the completely-refracted position and the Trigger Ball Bearing 0810 is off the Stopper 0700 . The Stopper 0700 remains in a rotated up position around the axis of the Stopper Pivot Pin 0710 .
[0171] As shown in FIG. 12 , the Trigger Assembly remains in a ready position, with a space cavity underneath between it and the top of the Trigger Main Body 0800 within the Clipper Main Body Nail Engagement Receptacle 0050 , permitting downward movement of the Depth Adjuster 0900 .
[0172] The Handle Return 0440 continues to push the Pushing Link 0460 . The Pushing Link 0460 continues to swing the handle open. During this process, the Stopper 0700 continues to travel under the Trigger Ball Bearing 0810 (See FIG. 9 ) until it passes the Trigger Ball Bearing 0810 (See FIG. 10 ). The Stopper Spring 0730 can then push the Stopper up until the Stopper Stop Pin 0750 hits the Stopper Stop Pin Notch 0765 .
[0173] At the same time, the Trigger Spring 0870 continues to swing the Trigger Assembly, clockwise (See FIG. 10 ) until the front of the Trigger Assembly would stop against the Clipper Main Body Nail Engagement Receptacle 0060 area (See FIGS. 10 , 11 , and 12 ). At that point, the Trigger Ball Bearing 0810 and Stopper 0700 would be facing each other (head to head).
[0174] As shown in FIG. 12 , the geometry of the Trigger Pivot Pin 0840 , Trigger Ball Bearing Pin 0820 , and Stopper Pivot Pin 0710 are crucial to facilitate movement of the clipper to the Fourth-Intermediate Position, such that if a straight line was drawn between the centers of the Trigger Pivot Pin 0840 and Stopper Pivot Pin 0710 , the center of the Trigger Ball Bearing 0810 would be slightly below that drawn straight line. This unique geometry means that if pressure was applied between the Stopper 0700 and Trigger Ball Bearing 0810 , that pressure would force the Trigger Assembly into a clockwise motion that forces the Trigger Main Body 0800 into remaining pressed against the Clipper Main Body 0050 . This same pressure also would force the Stopper 0700 to remain in an up position. By enabling the Handle Body 0100 to swing open, the Blade Holder Assembly is actually retracted backwards. The Blade 0600 then would allow access for the nail to be inserted to the Clipper Main Body Nail Engagement Receptacle 0060 .
[0175] With the Trigger Ball Bearing 0810 and Stopper 0700 against each other, the Blade Holder Assembly cannot be moved forward, but the Blade Spring 0535 can be compressed by squeezing the Handle Body 0100 , Squeezing the handle will cause the Rushing Link 0460 to go forward while the Blade Holder Assembly remains stationary. The Pushing Rod 0510 would slide inside the Rushing Link Rod Receptacle 0490 , As a result, the Blade Spring 0535 is further compressed (See FIGS. 11 and 12 ).
7) Fifth Intermediate Position:
Details of Motion
[0176] The Fifth-Intermediate Position is attained as the user pulls and applies sufficient rotational force for further articulation of the Handle Body 0100 as depicted in FIG. 1 . As shown in FIG. 13 , the Blade 0600 is in a completely retracted position, permitting the Cover Plate Nail Engagement Receptacle 0040 to receive a nail or claw further into the Clipper Main Body Nail Engagement Receptacle 0060 .
[0177] As shown in FIG. 13 , the Blade Holder 0570 is in the completely-refracted position and the Trigger Ball Bearing 0810 is off the Stopper 0700 . The Stopper 0700 remains in a rotated up position around the axis of the Stopper Pivot Pin 0710 .
[0178] As shown in FIG. 13 , the Depth Adjuster 0900 is partially depressed to a first position, reducing the space cavity underneath between it and the top of the Trigger Main Body 0800 within the Clipper Main Body Nail Engagement Receptacle 0060 , yet permitting additional downward movement of the Depth Adjuster 0900 .
[0179] The Handle Return Spring 0440 pushes the Pushing Link 0460 . The Pushing Link 0460 swings the handle open. During this process, the Stopper 0700 travels under the Trigger Ball Bearing 0810 (See FIG. 9 ) until it passes the Trigger Ball Bearing 0810 (See FIG. 10 ). The Stopper Spring 0730 can then push the Stopper 0700 up until the Stopper Stop Pin 0750 hits the Stopper Stop Pin Notch 0765 .
[0180] At the same time, the Trigger Spring 0870 swings the Trigger Assembly clockwise (See FIG. 10 ). The front of the Trigger Assembly is now stopped against the Clipper Main Body Nail Engagement Receptacle 0060 area (See FIGS. 10 , 11 and 12 ). Now the Trigger Ball Bearing 0810 and Stopper 0700 are facing each other (head to head).
[0181] As shown in FIG. 13 , the geometry of the Trigger Pivot Pin 0840 , Trigger Ball Bearing Pin 0820 , and Stopper Pivot Pin 0710 are crucial to facilitate movement of the clipper to the Fifth-Intermediate Position, such that if a straight line was drawn between the centers of the Trigger Pivot Pin 0840 and Stopper Pivot Pin 0710 , the center of the Trigger Ball Bearing 0810 would be inline with that drawn straight line. This unique geometry means that if pressure was applied between the Stopper 0700 and Trigger Ball Bearing 0810 , that pressure would force the Trigger Assembly into a clockwise motion that forces the Trigger Main Body 0800 into remaining pressed against the Clipper Main Body 0050 . This same pressure also would force the Stopper 0700 to remain in an up position. By enabling the Handle Body 0100 to swing open, the Blade Holder Assembly is actually retracted backwards. The Blade 0600 then would allow access for the nail to be inserted to the Clipper Main Body Nail Engagement Receptacle 0060 .
[0182] With the Trigger Ball Bearing 0810 and Stopper 0700 against each other, the Blade Holder Assembly cannot be moved forward, but the Blade Spring 0535 can be compressed by squeezing the Handle Body 0100 . Squeezing the Handle Body 0100 causes the Pushing Link 0460 to go forward while the Blade Holder Assembly remains stationary. The Pushing Rod 0510 slides inside the Pushing Link Rod Receptacle 0490 . As a result, the Blade Spring 0535 is completely compressed (See FIGS. 11 and 12 ).
8) Sixth Intermediate Position:
Details of Motion
[0183] The Sixth-Intermediate Position is attained when as shown in FIG. 14 , the Blade 0600 is released, closing to a partially refracted position. The Blade 600 begins to engage a nail or claw inside the Clipper Main Body Nail Engagement Receptacle 0060 .
[0184] As shown in FIG. 14 , the Blade Holder 0570 is in a partially-retracted position and the Trigger Ball Bearing 0810 reengages to rest upon the Stopper 0700 in a second position.
[0185] As shown in FIG. 14 , the Depth Adjuster 0900 is fully depressed to a second position.
[0186] The insertion of a nail or claw into the Clipper Main Body Nail Engagement Receptacle 0060 , to a sufficient depth based on the adjustable setting of the Depth Adjustment Screw 0910 , causes the nail or claw to make contact with the Depth Adjuster 0900 . Pressure against the Depth Adjuster 0900 causes the Trigger Assembly to rotate counter clockwise (See FIG. 13 ). The Trigger Ball Bearing 0810 travels up until it finds itself above the Stopper 0700 (See FIG. 14 ). Now, the loaded. Blade Holder Assembly shoots forward (See FIGS. 14 and 15 ) and the Blade 0600 cuts the nail.
9) Final Position:
Details of Motion
[0187] The Final Position is attained when as shown in FIG. 15 , the Blade 0600 is released, closing to a non-refracted position. The Blade 0600 has completely engaged a nail or claw inside the Clipper Main Body Nail Engagement Receptacle 0060 .
[0188] As shown in FIG. 15 , the Blade Holder 0570 is in a non-refracted position and the Trigger Ball Bearing 0810 reengages to rest upon the Stopper 0700 in a first position.
[0189] As shown in FIG. 15 , the Depth Adjuster 0900 remains fully depressed to a second position.
[0190] After the loaded Blade Holder Assembly shoots forward (See FIGS. 14 and 15 ) and the nail or claw is cut, the nail or claw is contained inside the Nail Engagement Receptacle between the Depth Adjuster 0900 and the Blade 0600 . Once fired, the Handle Return Spring 0440 allows the handle to retract, and the Blade Holder Assembly retracts. The cut nail or claw can be removed from the Clipper Main Body Nail Engagement Receptacle 0060 through inversion of the entire apparatus. The apparatus is then ready for another cycle that can be repeated very quickly (at about 2 second increments if necessary), or the user may adjust the desired cutting length by rotating the Depth Adjustment Screw 0910 as necessary before repetition.
[0191] As required, detailed embodiments of the present invention are disclosed herein; however, it is to be understood that the disclosed embodiments are merely exemplary of the invention, which can be embodied in various forms. Therefore, specific structural and functional details disclosed herein are not to be interpreted as limiting, but merely as a basis for the claims and as a representative basis for teaching one skilled in the art to variously employ the present invention in virtually any appropriately detailed structure. Further, the terms and phrases used herein are not intended to be limiting; but rather, to provide an understandable description of the invention.
[0192] The terms “a” or “an”, as used herein, are defined as one or more than one. The term plurality, as used herein, is defined as two or more than two. The term another, as used herein, is defined as at least a second or more. The terms including and/or having, as used herein, are defined as comprising (i.e., open language). The term coupled, as used herein, is defined as connected, although not necessarily directly, and not necessarily mechanically.
[0193] Any element in a claim that does not explicitly state “means for” performing a specific function, or “step for” performing a specific function, is not be interpreted as a “means” or “step” clause as specified in 35 U.S.C. Sec. 112, Paragraph 6. In particular, any use of “step of” in the claims herein is not intended to invoke the provisions of 35 U.S.C. Sec. 112, Paragraph 6.

